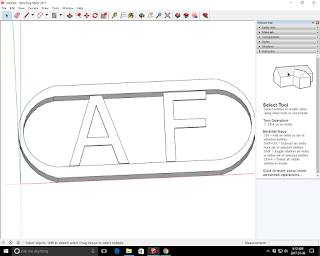
open sketchup, choose template, then click start.
click camera; standard views;top.
draw a rectangle with the rectangle tool, start in in the origin, enter the dementions as 100mm, 40mm.
click zoom extense tool which will zoom in to your rectangle.
get the tape measure tool and draw a 5mm border from top to bottom which you can also enter at the bottom to easily make it exact.
on the side do the same thing with 20mm on each end.
choose the arc tool and click on the inner section of the 20 mm line on the top and bottom of the rectangle to make a half circle on each side.then do one in the inside of that as well on the bottom and top of the 5mm points.
click the line tool to join the two small internel arcs.
grab the eraser tool and erase the corners which will leave you with the oval.
also get rid of the extra 5mm and 20mm guidelines.
erase the middle and right click and click erase.
choose the orbit tool and rotate it so you can see it
choose the push and pull tool and click on the border to make it 3d.
than zoom out a little bit
choose tools; 3d text click the centre and type in your initials mine are AF, then choose a clear thick font.
then click extruded to 5mm and height to 31 mm then click place.
click the move tool and find the mid point and click and drag until you find the edge and drop it in.
zoom in to check it to see if there are any gaps.
if there are gaps then you need to edit the size so click your text click the S key and drag it until it fits.
it won't matter if it is over lapping a little bit.
to add colour choose the painbucket tool, select colour, and then choose a colour that you like
here is mine:

Predicted final grade would be probably 60%.
My predicted grade back in September was 75%.

No comments:
Post a Comment